레이아웃 중 그리드/격자레이아웃(GridLayout) 사용 방법에 대해 알아보겠음.
ㅁ. Layout 은 다음과 같이 나뉘고 각 특성을 같으므로 적절하게 사용하면 된다.
FlowLayout 은 가운데를 중심으로 배치.
BorderLayout 은 가운데를 중심으로 동서남북으로 배치.
GridLayout (행, 열); - 0을 기입하면 auto.!!!
; (예, gridLayout(0,2) 로 만들면 2열이 넘어가는 데이터가 3열로 오면 자동으로 다음행1열로 간다. )
BoxLayout ; 한칸(행)에 하나씩 차지하도록 하는 배치.
ㅁ. 판넬로 주로 쓰이기 때문에 판넬을 만들고 default레이아웃을 생각하지말고 Layout을 만들어준다고 생각하면됨.
00. 격자레이아웃(GridLayout) 은 격자처럼 들어가게 하는 레이아웃이다.
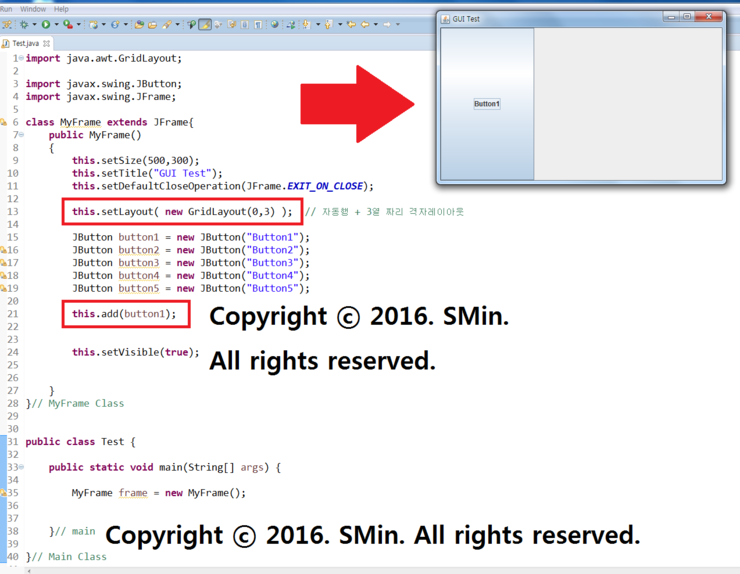
01. 객체생성시 new GridLayout(행, 열, 수평gap, 수직gap) 임이 적용됨을 확인할 수 있다.

※. 코드
import java.awt.GridLayout;
import javax.swing.JButton;
import javax.swing.JFrame;
class MyFrame extends JFrame{
public MyFrame()
{
this.setSize(500,300);
this.setTitle("GUI Test");
this.setDefaultCloseOperation(JFrame.EXIT_ON_CLOSE);
// this.setLayout( new GridLayout(0,3) ); // 자동행 + 3열 짜리 격자레이아웃
this.setLayout( new GridLayout(0, 3, 5, 20) ); // 행, 열, 수평gap, 수직gap
JButton button1 = new JButton("Button1");
JButton button2 = new JButton("Button2");
JButton button3 = new JButton("Button3");
JButton button4 = new JButton("Button4");
JButton button5 = new JButton("Button5");
this.add(button1);
this.add(button2);
this.add(button3);
this.add(button4);
this.add(button5);
this.pack();
this.setVisible(true);
}
}// MyFrame Class
public class Test {
public static void main(String[] args) {
MyFrame frame = new MyFrame();
}// main
}// Main Class