Getter & Setter 하는 방법임.
ㅁ. 겟터셋터의 이름의 유래는 GetXXX SetXXX 인데 이것들을 모아서 겟터 셋터 라고 부르게 되었다.
ㅁ. 겟터셋터 목적:
; 재정의하면 문법적으로 맞기때문에 통제 할 수 없다. 따라서 게터세터를 사용해서 통제시킬 수 있다.
( 예, 객체.변수 = 임의의값; -> 임의의값이 그냥 출력된다.
객체.setter(임의의값); -> 클래스에서 if 문등을 써서 제어할 수 있다. - 예, 음수값이 나오면 error출력 )
일단 시작해보자.
00_1. Car클래스를 하나 만들고 변수를 private으로 두자.
변수들이 private이 되면 값이 고정되므로, 다른 클래스에서 없는변수(invisible)로 나오기 때문에
값을 수정해 주고 싶을때에는 Setter로 재정의 하게 만들어주고 Getter로 불러오게 하는 개념이다.

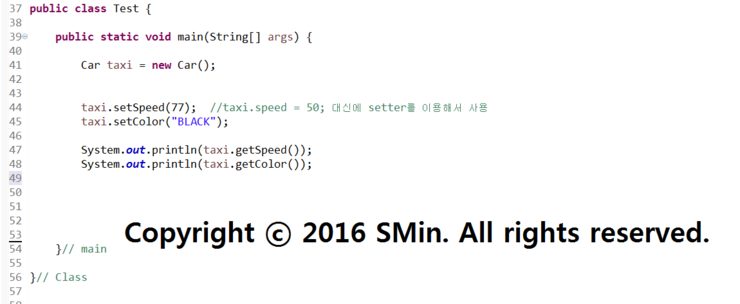
00_2. 메인클래스를 만들어서 셋터로 값을 수정해서 겟터로 출력해보자.

01. 값이 출력된 것을 확인할 수 있다.

02. 아래와 같이 받은 셋터값을 변수로 담아서 출력해도 무관하다.

※. 코드
※. 코드
class Car{
private String color; // 원칙적으로 변수는 private
private int speed;
public String getColor()
{
return color;
}
public void setColor(String color) // return type이 필요없는경우 void // default 값으로 String c를 color에 셋팅해라.
{
this.color =color; // this 는 자기 자신을 나타내는 객체(여기서는 제일위에 선언된 color)
}
public void setSpeed(int speed) // setter가 없으면 다른 사람들이 값을 setting 할 수 없으므로 제공해줘야함.
{
if(speed <0)
{
speed = 0;
}
this.speed = speed; // = set 한 speed 값을 우리가 처음 선언한 speed 값으로 재정의해라.
}
public int getSpeed()
{
return speed;
}
public String toString()
{
return "(speed, color) = (" + speed + "," + color + ")";
}
}// Car Class
public class Test {
public static void main(String[] args) {
Car taxi = new Car();
taxi.setSpeed(-20); //taxi.speed = 50; 대신에 setter를 이용해서 사용
int taxiSpeed =taxi.getSpeed();
taxi.setSpeed(77); //taxi.speed = 50; 대신에 setter를 이용해서 사용
int taxiSpeed2 =taxi.getSpeed();
taxi.setColor("BLACK");
System.out.println(taxiSpeed);
System.out.println(taxiSpeed2);
System.out.println(taxi.getSpeed());
System.out.println(taxi.getColor());
}// main
}// Class
