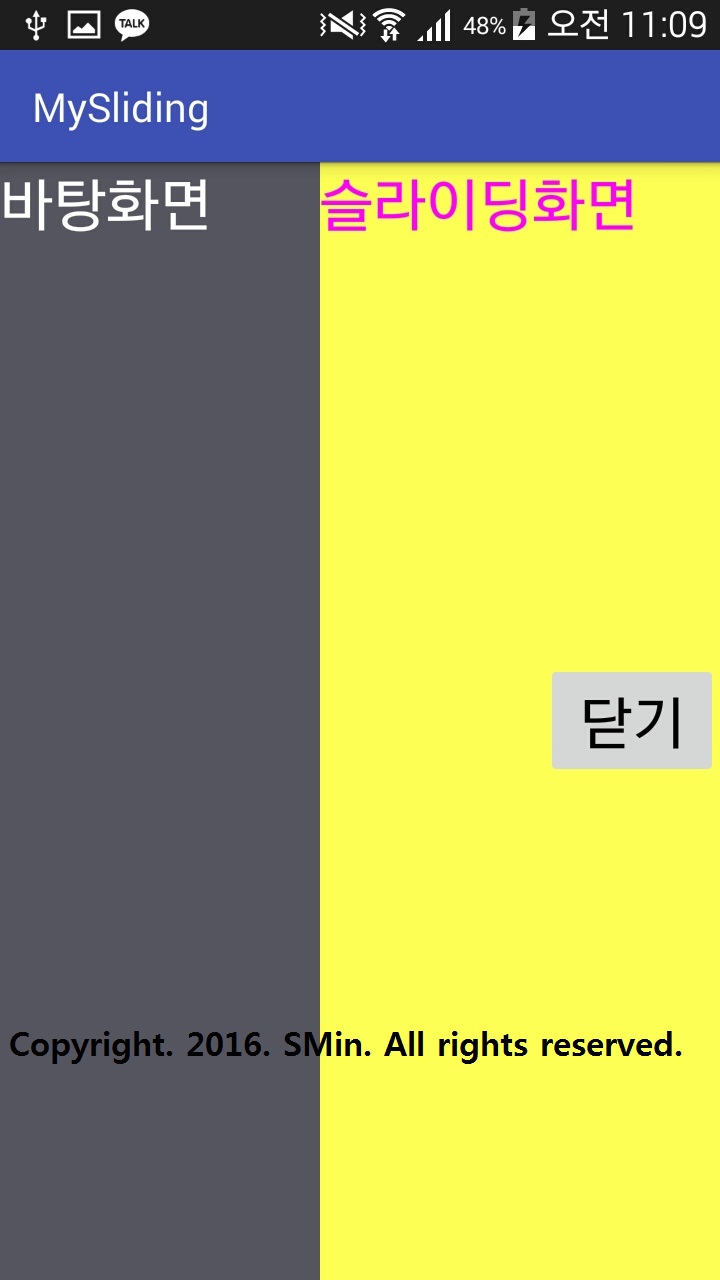
페이지슬라이딩 하는 방법임.
00. 하단의 Text탭을 눌러 코드를 추가 및 수정해준다. 그리고 옆에 Design탭을 눌러 확인해보자.
<?xml version="1.0" encoding="utf-8"?>
<FrameLayout xmlns:android="http://schemas.android.com/apk/res/android"
android:layout_width="match_parent"
android:layout_height="match_parent" >
<LinearLayout
android:layout_width="match_parent"
android:layout_height="match_parent"
android:orientation="vertical"
android:background="#ff55555f" >
<TextView
android:layout_width="wrap_content"
android:layout_height="wrap_content"
android:text="바탕화면"
android:textColor="#ffffff"
android:textSize="30dp" />
</LinearLayout>
<LinearLayout
android:id="@+id/slidingPanel"
android:layout_width="200dp"
android:layout_height="match_parent"
android:orientation="vertical"
android:background="#ffffff55"
android:layout_gravity="right"
android:visibility="gone">
<TextView
android:layout_width="wrap_content"
android:layout_height="wrap_content"
android:text="슬라이딩화면"
android:textColor="#ff00ff"
android:textSize="30dp" />
</LinearLayout>
<Button
android:id="@+id/button"
android:layout_width="wrap_content"
android:layout_height="wrap_content"
android:layout_gravity="right|center_vertical"
android:text="열기"
android:textColor="#ff000000"
android:textSize="30dp" />
</FrameLayout>
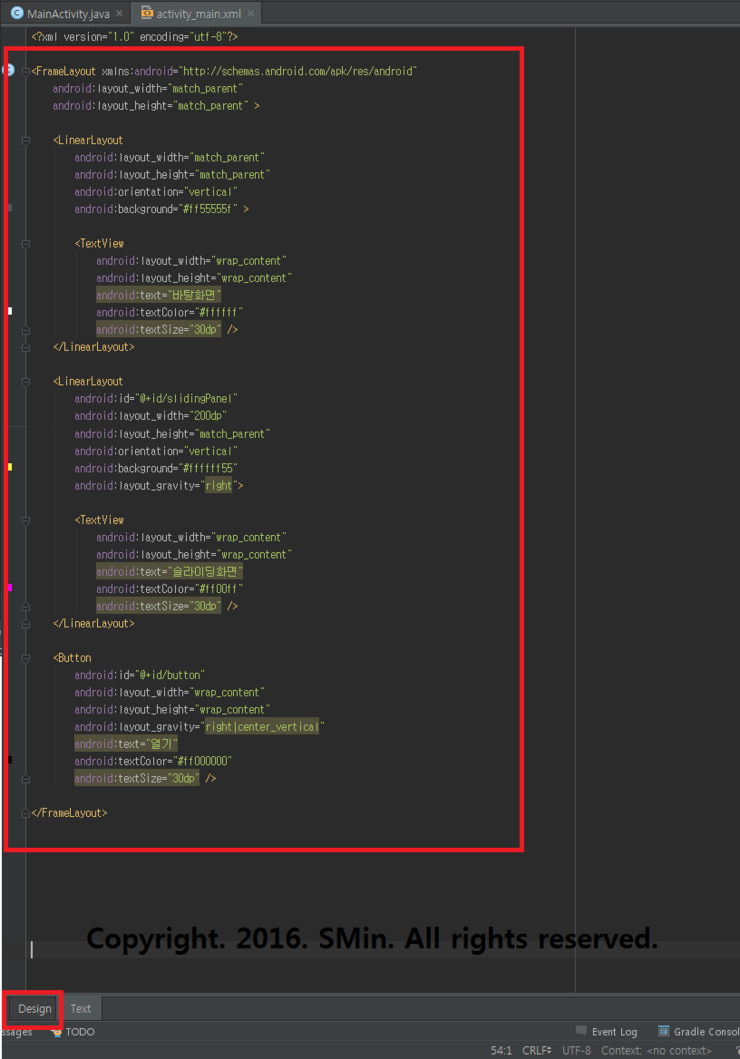
01. 추가 및 수정한 코드가 잘 들어갔다 확인한다.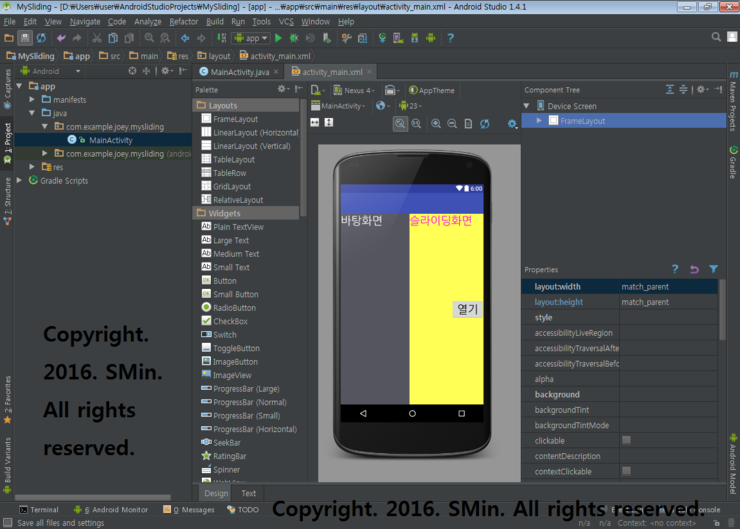
02. 바탕화면을 처음에 보이게 하기위해 슬라이딩레이아웃의 visivility를 안보이게한다.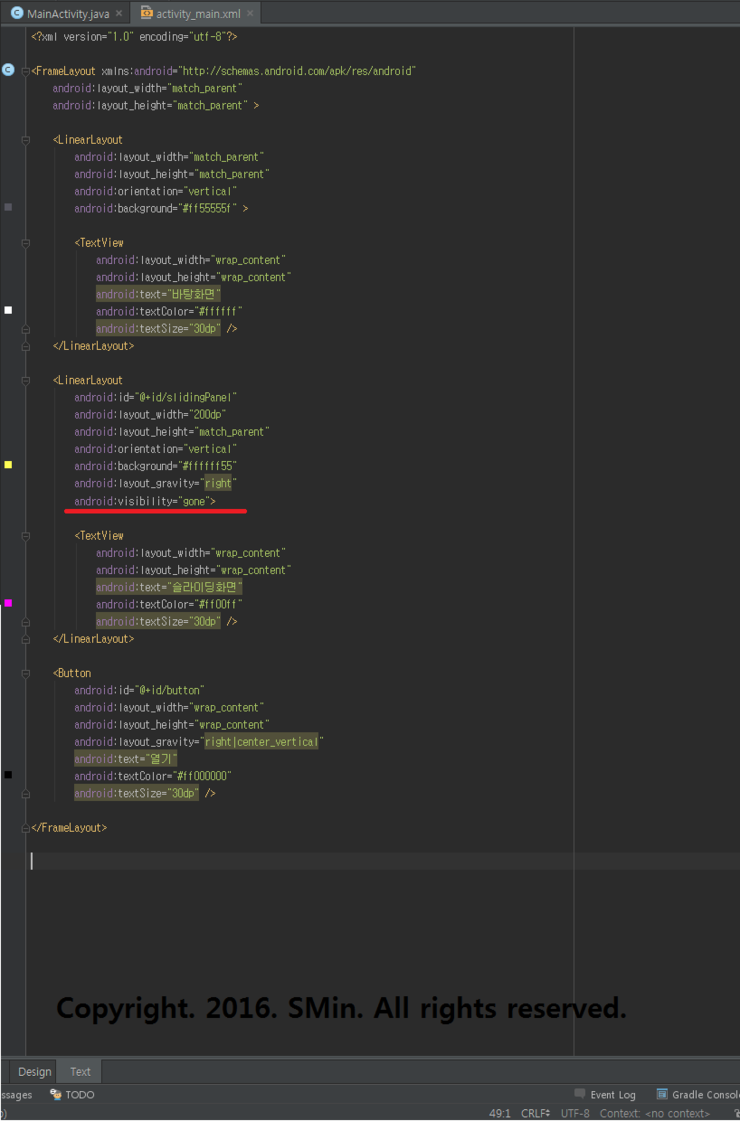
03. 잘 들어갔는지 확인 할 수 있다.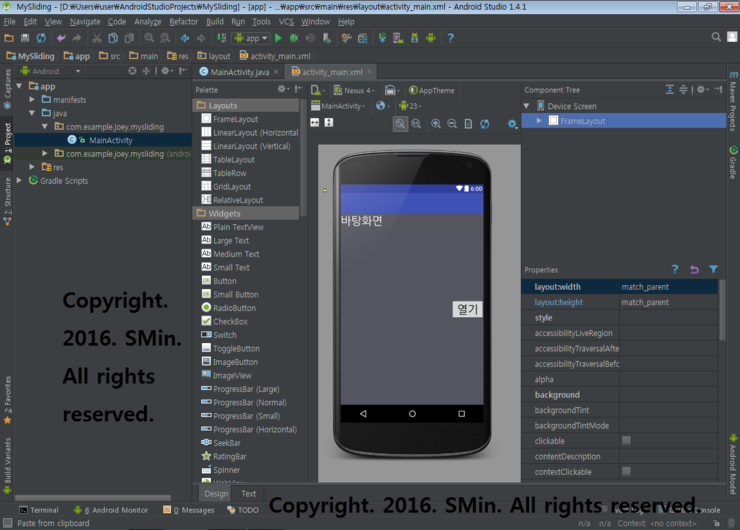
04. 왼쪽트리에서 res 마우스오른쪽버튼 -> New -> Android resource directory 를 눌러 새로운 디렉터리를 생성한다.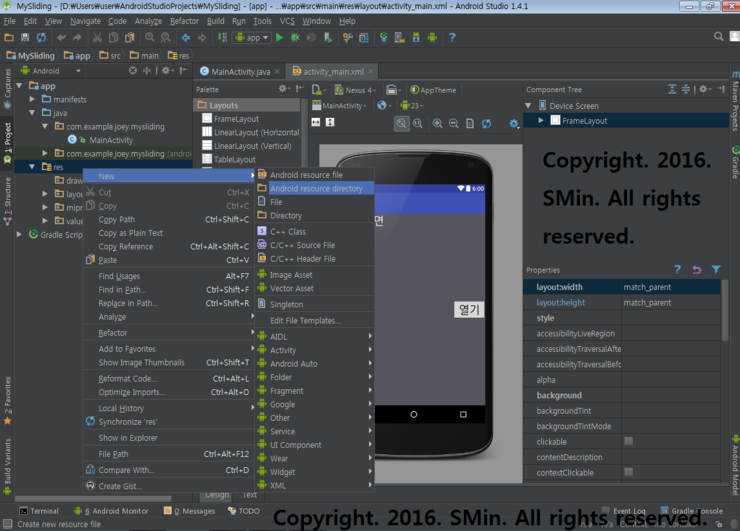
05. Type에 anim 을 선택하고 OK를 누른다.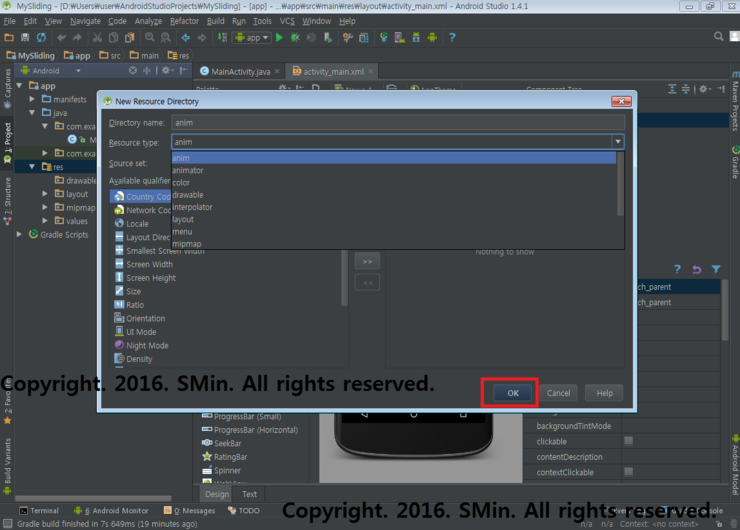
06. 생성된 anim 디렉터리에서 마우스오른쪽버튼 -> New -> resource file 을 클릭하자.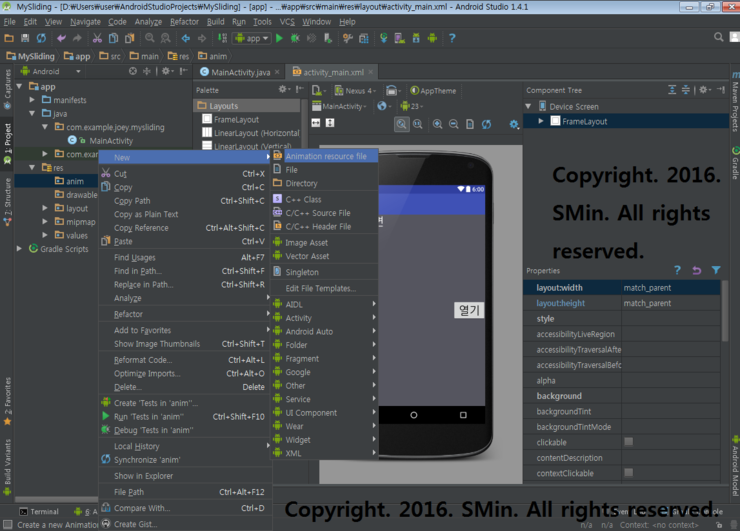
07. 이름을 지어주고 OK버튼클릭 (왼쪽으로 움직일 효과를 넣을것이라서 move_left라 지어줬음.)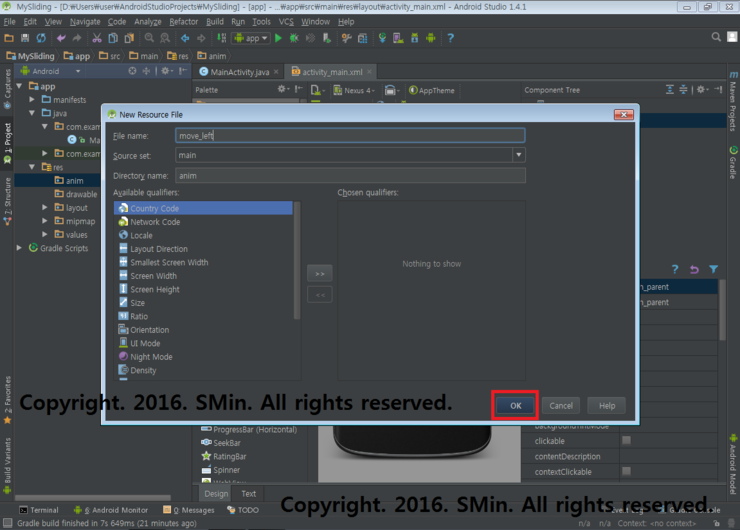
08. 애니메이션효과들을 넣어준다.
<?xml version="1.0" encoding="utf-8"?>
<set xmlns:android="http://schemas.android.com/apk/res/android">
<translate
android:fromXDelta="100%p"
android:toXDelta="0%p"
android:duration="500"
android:repeatCount="0"
android:fillAfter="true" />
</set>
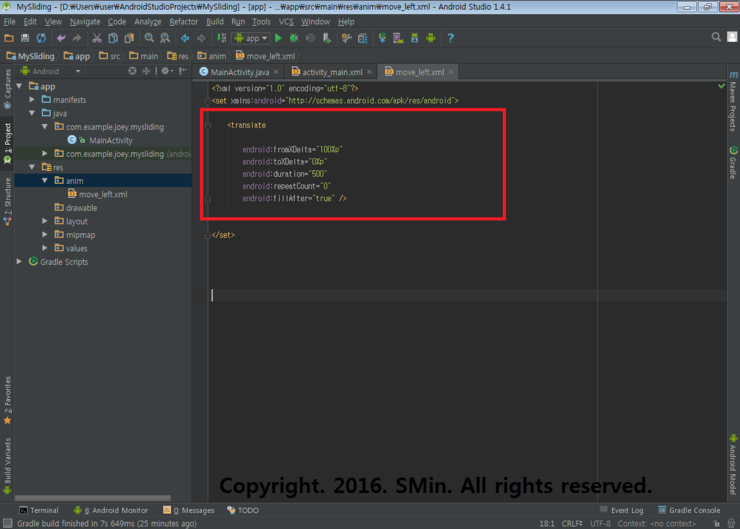
09. anim디렉터리에서 이번에는 오른쪽으로 움직일 resource file을 생성해주고 ok를 누른다.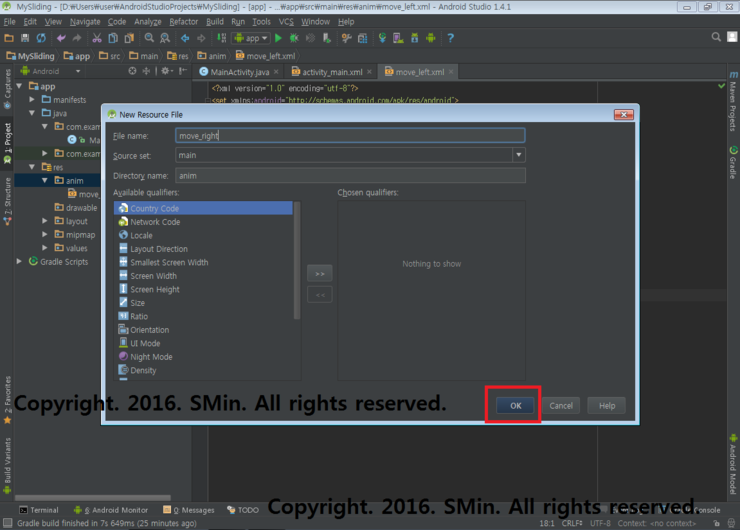
10. 코드를 입력해주자.
<?xml version="1.0" encoding="utf-8"?>
<set xmlns:android="http://schemas.android.com/apk/res/android">
<translate
android:fromXDelta="0%p"
android:toXDelta="100%p"
android:duration="500"
android:repeatCount="0"
android:fillAfter="false" />
</set>
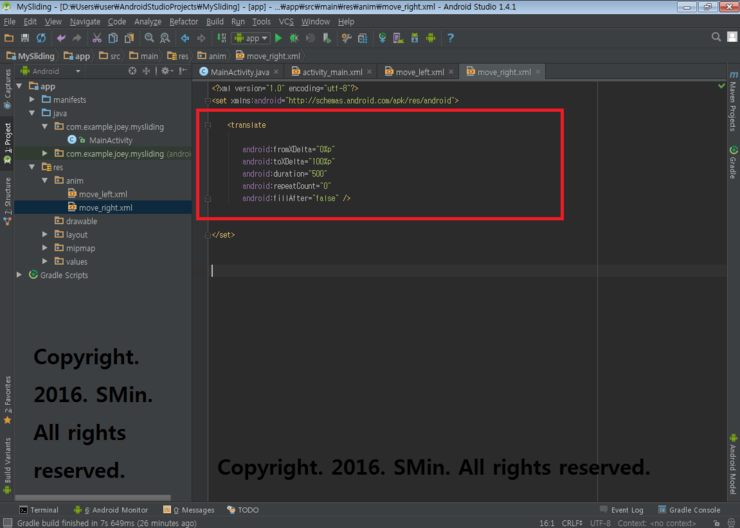
11. 메인Script에서 만들어놓은 코드 및 버튼들을 로딩하고 실행시켜보자.
public class MainActivity extends AppCompatActivity {
LinearLayout slidingPanel;
Button button;
Animation moveLeftAnim;
Animation moveRightAnim;
@Override
protected void onCreate(Bundle savedInstanceState) {
super.onCreate(savedInstanceState);
setContentView(R.layout.activity_main);
moveLeftAnim = AnimationUtils.loadAnimation(this, R.anim.move_left);
moveRightAnim = AnimationUtils.loadAnimation(this, R.anim.move_right);
slidingPanel = (LinearLayout) findViewById(R.id.slidingPanel);
button = (Button) findViewById(R.id.button);
button.setOnClickListener(new View.OnClickListener() {
@Override
public void onClick(View v) {
slidingPanel.setVisibility(View.VISIBLE);
slidingPanel.startAnimation(moveLeftAnim);
}
});
}
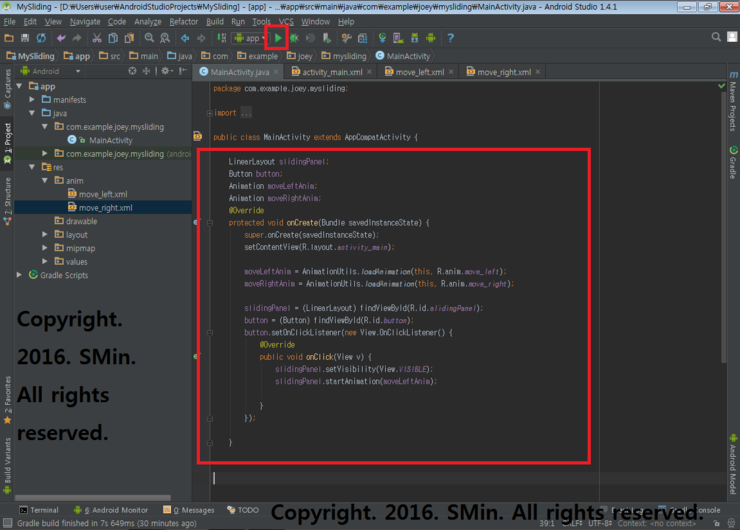
12. 실행시켜보자.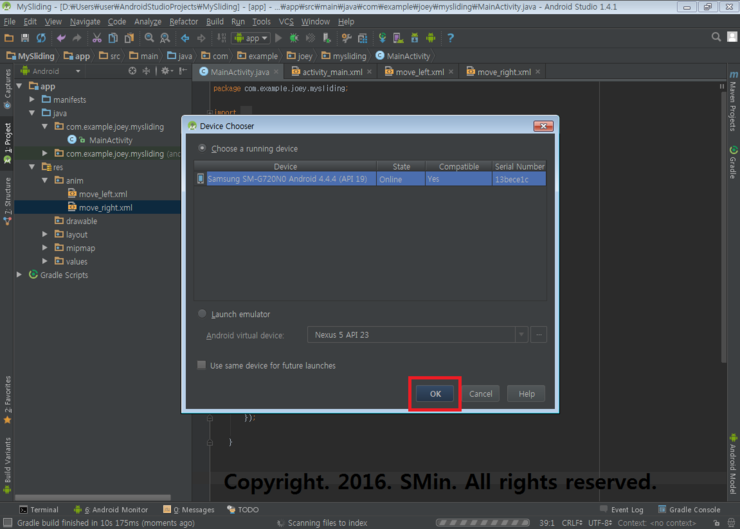
13. 열기버튼을 눌러서 실행시켜보자.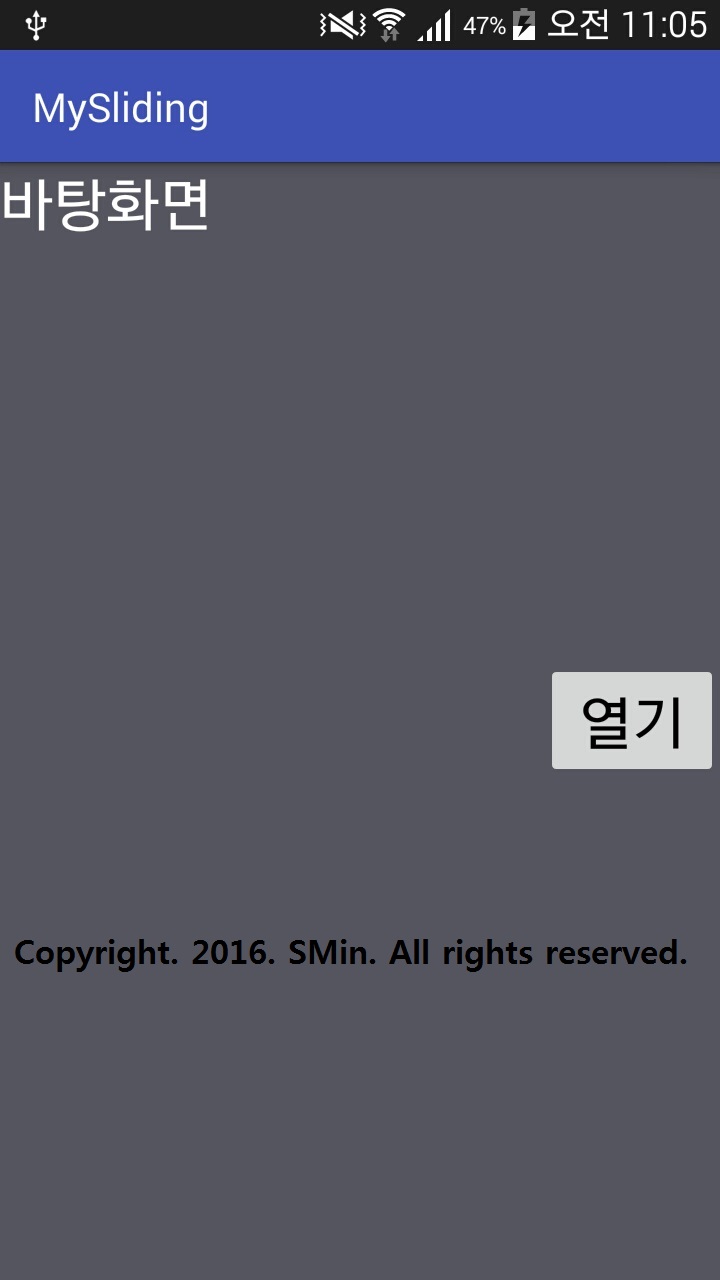
14. 정상적으로 구동됨을 확인할 수 있다.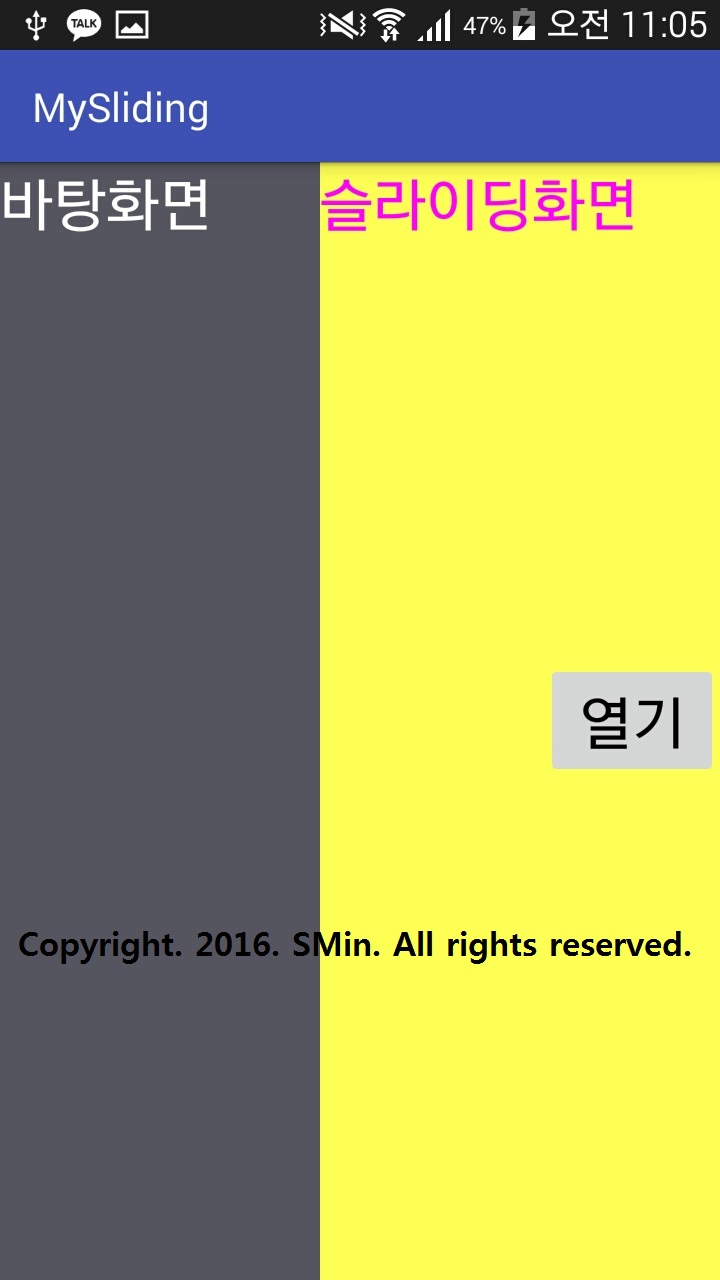
15. 중간에 Listener를 불러와서 열린후에 "닫기" 로 텍스트가 바뀌게 코드를 조금 추가 및 수정해보자.
public class MainActivity extends AppCompatActivity {
LinearLayout slidingPanel;
Button button;
Animation moveLeftAnim;
Animation moveRightAnim;
@Override
protected void onCreate(Bundle savedInstanceState) {
super.onCreate(savedInstanceState);
setContentView(R.layout.activity_main);
moveLeftAnim = AnimationUtils.loadAnimation(this, R.anim.move_left);
moveRightAnim = AnimationUtils.loadAnimation(this, R.anim.move_right);
moveLeftAnim.setAnimationListener(new Animation.AnimationListener() {
@Override
public void onAnimationStart(Animation animation) {
}
@Override
public void onAnimationEnd(Animation animation) {
button.setText("닫기");
}
@Override
public void onAnimationRepeat(Animation animation) {
}
});
slidingPanel = (LinearLayout) findViewById(R.id.slidingPanel);
button = (Button) findViewById(R.id.button);
button.setOnClickListener(new View.OnClickListener() {
@Override
public void onClick(View v) {
slidingPanel.setVisibility(View.VISIBLE);
slidingPanel.startAnimation(moveLeftAnim);
}
});
}
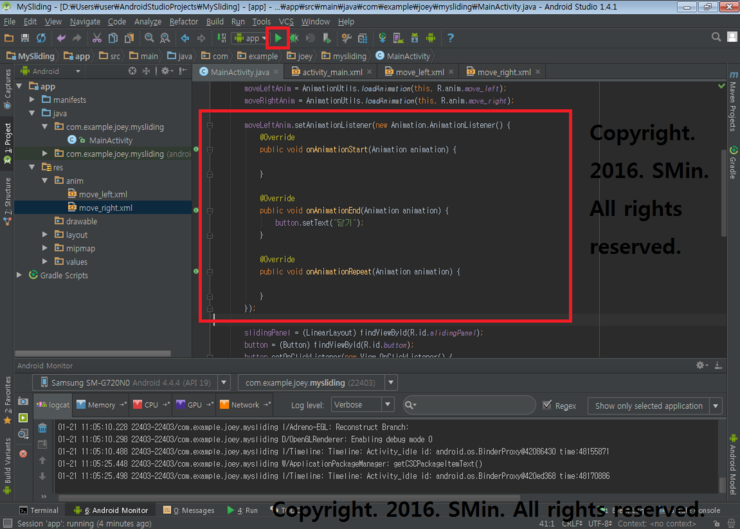
16. 실행시켜보자.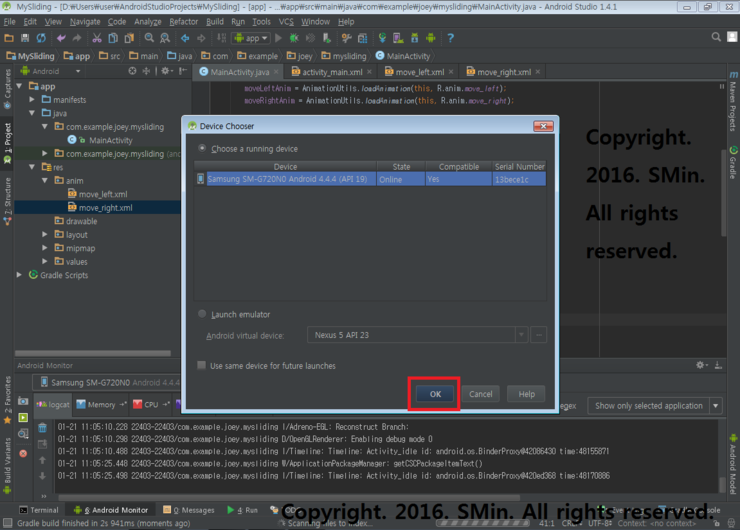
17. 버튼을 눌러보자.
18. 슬라이딩화면이 끝나고 "열기" 텍스트가 "닫기" 로 바뀌는 것을 확인 할 수 있다.